Quantcast
Channel: holidays – Stamping with Buffy
Viewing all 68 articles
Browse latest View live

Mr. Snowman

$
0
0

White Christmas, Stampin' Up!

Is this running through your head, too, “…bring me a dream (bum bum bum bum) make him the cutest that you’ve ever seen (bum bum bum bum)…”?  No?  Well, now it is!

I love the White Christmas set from the Stampin’ Up! Holiday catalog.  It’s so versatile.  This could be a Christmas card, or a thank you or winter birthday, or a thinking of you.  Doesn’t it look like the snowman and bird are having a little chat about winter?

This is one of the cards we’ll be making in our card classes this month.  It looks hard, but it’s really simple.  Just stamp the trees, snowman, bird and star, add some sponging and some color.  Done!

I added a little 1/8″ silver ribbon before I layered the Whisper White panel to the Soft Sky card.  You could use Soft Sky taffeta or Real Red cotton ribbon and it would look lovely, too.  Or – check out the Real Red satin woven ribbon in the Holiday catalog.  Gorgeous!

Thanks for stopping by Stamping with Buffy.  Have a wonderful day!


Filed under: White Christmas

Hello December Gift Card Holder

$
0
0

Stampin' Up!, Hello December Well, here it is, only ten days until Christmas.  Do you know how much decorating I’ve done?  None.  How close to having all my shopping for gifts and dinner finished?  Not even close.  Now that I’m helping Mike in the office, I don’t get my free days, and it’s showing!  Ah, well.  We’ll still have a great time with family, tree or no tree, right?  Because, of course, we’ll all be paying so much attention to Miss Amelia that no one will notice that we don’t have a tree decorated.

I have been working on a project for January for Craft Project Central, so I don’t have anything original to show you today.  But here’s an idea from my web site (created by Stampin’ Up!) using the gift card thinlits from the Holiday Catalog and the Hello December Project Life by Stampin’ Up! pack.  (Project Life isn’t just for memory keeping!)  I have a feeling my family is going to be seeing a lot of these next week!

You can find the instructions and supply list for this project here.

Hope your preparations are going better than mine, and that your holidays are very happy ones!  Thanks for stopping by Stamping with Buffy.


Filed under: 3-D and other projects, Holidays

Valentine’s Day Gift Packaging & Card

$
0
0

Show your Valentine how much you care by making these gift packages and coordinating card for your sweetie. There’s a treat basket made with the Mini Treat Bag Thinlits Dies and two treat holders made with the Scalloped Tag Topper Punch. Fill the packages up with goodies, and give them all to your Valentine, along with the coordinating card. This would also make a great Valentine’s Day themed class.

Craft Project Central, Stampin' Up!

This great Valentine’s Day gift packaging project comes to you designed by Christy for Craft Project Central.  To get the instructions for Christy’s project, simply subscribe to January (or one of our 3, 6 or 12 month discounted packages !).

Thanks for stopping by Stamping with Buffy.  Have a wonderful day!


Filed under: Craft Project Central, Valentine's Day

A Penguin Birthday

$
0
0

Snow Place, Stampin' Up!

This is a birthday card for my 21 year old niece. I can’t believe she’s 21 already! It just seems like yesterday…Well, you know.

Kristin is a huge Pens fan, so I thought the Snow Place penguin would be a perfect card for her.  It was so easy to stamp all the elements – the penguin, scarf, and ear muffs -and die-cut them together.

I used a lot of the new Holiday catalog products for this card – and you can see them at the end of the blog. I was happy with how quickly this card came together.

Today was my catch up day. This is the only project I made that I can share right away. The rest are for “down the road” challenges and projects, but I had fun!

Hope your weekend was as fab as mine was! Thanks for stopping by Stamping with Buffy.  Have a wonderful day!

Supply List

Built for Free Using:  My Stampin Blog


Filed under: Snow Place

Cozy Christmas

$
0
0

Today was dedicated to (mostly) stamping. I had a blast! I tried a lot of new techniques, some old techniques, and used most of my new stamps. This is one of my favorites, and I’ve been itching to use it, because it reminds me of “home.”

Stampin' Up!, Cozy Christmas

I sponged some Whisper White card stock with Night of Navy classic ink. And, of course, I masked a moon with a post-it note. After I finished, I added some Daffodil Delight to the moon with a sponge dauber. And then, I pulled a Jackie Susnik. Jackie is one of my dear Stampin’ Up! Demonstrator cyber friends. Jackie is one of the designers for the Watercooler Wednesday challenge as well as one of my fellow “hoppers” each month (and that’s coming up Thursday, by the way).

For one of Jackie’s challenge cards, she did this cool spritzy thing after she inked a card, so I copied her idea. I splattered some water from an aqua painter over the night sky. I didn’t think it was splattery enough, so I spritzed a little water over it using an old Stampin’ Mist bottle for good measure. Except, I got a little whiff of rose scent, so I’m thinking I grabbed the wrong bottle. But, hey – Stampin’ Mist works just as well (or better!) than water.

I stamped the little cottage two times – once on the card and once on a scrap of Whisper White cardstock. I cut out the Whisper White one and layered it on the card. (True confession time. The reason I stamped it twice? I didn’t want to cut out the chimney smoke. So I just cut it off the Whisper White piece, then layered the cottage and trees over it.)

I ripped up a few other pieces of Whisper White and sponged a bit of Night of Navy over them to give the snow drifts a little depth. Then I stamped Santa and the reindeer (you can’t really see it, but Rudolph has a Cherry Cobbler Dazzling Details nose!) over the moon.

For the sentiment, I inked the “Christmas” part of the Merry Christmas stamp from Teeny Tiny Wishes with a Night of Navy marker and stamped it on the bottom of the card. “Merry” is die-cut using the Christmas Greetings Thinlits and Silver Glimmer Paper. The Fine-Tip Glue Pen is the perfect adhesive for these thinlits.

As a final touch, I added a little Dazzling Details to the snow on the house roof, trees, and snow drifts, and warmed up the house with some Daffodil Delight in the windows.

As you can see, I’m having a blast with the Holiday Catalog. If you haven’t gotten one yet, be sure to let me know so I can send you one!

Thanks for stopping by Stamping with Buffy. Have a wonderful day!


Filed under: Big Shot, Cozy Christmas

Festive Flower Punch

$
0
0

You’re going to LOVE the Watercooler Blog Hop that starts tonight. But in the meantime, check out this video showing how to make gorgeous poinsettias with the Festive Flower Punch. And it doesn’t have to be just for Christmas. You can change the colors of the petals and make flowers all year long!

Festive Flower Punch, Stampin' Up!

Don’t forget to check back in at 9 p.m. Eastern time for the hop!

Thanks for stopping by Stamping with Buffy. Have a wonderful day!


Filed under: Holidays, Videos

October Holiday Blog Hop

$
0
0

October 2015 Banner

I’m so excited to be part of the Wacky Watercooler hop this month! We have a great group of designers, and we’ll be showing you projects using the Stampin’ Up! Holiday and Annual catalogs.

If you’re just starting the hop, I have great news for you. I’m at the beginning! Woot! I’m not sure I’ve ever been first before. But if you’re not starting with me, that’s fine, too. The hop is a circle, so wherever you start, you can just keep moving until you get back to where you started. If you get lost – no problem. Just head to the home page to find your way.

So here we go. I’m so psyched about my projects. I love all of them.

First – here’s a spooky “Don’t walk in the woods at night” project.

Stampin' Up!, Woodlands TIEF

The Woodlands embossing folder has brought back an old technique – Inked Embossing Folders. I haven’t inked an embossing folder for several years, but that technique works so well with this folder. First, I inked a small portion of the debossed side of the folder with a little Daffodil Delight ink, then covered it with a circle mask. I inked the rest of the folder with Night of Navy ink, then ran it through the Big Shot with Whisper White card stock. I used various circle punches and the ovals in the Chalk Talk framelits for eyes, then backed the panel with some Daffodil Delight card stock. I started to add a “Spooky” die-cut from the Seasonal Frame Thinlits dies, but everyone in the house liked the card without it, so I went with their vote.

Next is a Clean and Simple card. Yep. I rarely do CAS cards, because I almost always smudge something. And I love to sponge and make vintage cards. But this one just kind of happened, and I love it.

Stampin' Up!, Watercooler Blog Hop

I die-cut the ornament and sentiment (Delicate Ornaments, Christmas Greetings Thinlits) from Gold Foil sheets. This was supposed to be a shaker card, but I’m seriously shaker challenged. So I embossed a Whisper White card stock layer with the Softly Falling embossing folder and then die cut the ornament image from the layer. I adhered it to a Whisper White thick card stock card, then added the gold ornament back in.

I decided it needed a little something (I always seem to decide my cards need “a little something,” don’t I?), so I inked a Snowflake Element with versamark, dunked it in Heat & Stick Powder, heated it, then added some Gold Glitter and an Iced Rhinestone Embellishment to the center.

Did you realize that I didn’t stamp on either of the first two projects? Neither did I, until I wrote this post. Interesting. Sizzix has a lot to answer for. Well, I made up for it on the next one, because it’s all stamped.

This is the one that kept me awake at nights thinking about how to make it.

Stampin' Up!, Watercooler Blog Hop

I made a box from vellum card stock, then added stamped and die-cut images from the Festive Fireplace bundle over the box. I absolutely love the way this looks with the little votive inside it. It really does look like a fire is crackling away. The best thing about this is that you can use it all winter long!

So that’s it for me. If you’re hopping in order, your next stop is Deborah Smart’s blog. Deb always, always “Wows” me. She’s an amazing artist and I know she has another fabulous group of projects for you. If you’re hopping backwards, you’ll be headed to Priscilla Ivler’s blog. Priscilla is another wonderful stamping artist. Either way you go, you’re going to want to complete the circle, because all of our Watercooler artists are very talented!

Thanks for stopping by Stamping with Buffy. Have a wonderful day!

Stampin' Up, Watercooler Blog Hop Priscilla's Blog, Stampin' Up! Wacky Watercooler Blog Hop, Stampin' Up!


Filed under: Holidays

All Ye Faithful

$
0
0

Craft Project Central has a monthly sketch challenge, Creating Pretty Cards. The sketches are always so fun, and if your card is the randomly chosen one, you win a free subscription to Craft Project Central.

Here’s this month’s sketch.

Craft Project Central, Stampin' Up!

And here’s my card. (Edited – I realized after I linked my card to the CPC site that my image was centered. So this is the “do-over” that’s a little more faithful to Christy’s sketch.)

CPCOctoberSketch

I used All Ye Faithful for the main image. and Wonderland for the sentiment and snowflakes. I also stamped some snowflakes in Versamark on the Home for Christmas designer series paper and embossed them with Iridescent Ice powder. It adds just a little sparkle and ice, I think.

The Snowflake Element seemed to fit with the rest of the card, but it needed to be a little more sparkly. I inked it with versamark, then used Heat & Stick powder and some gold glitter to glam it up a little.

My final embellishment was a strip of Gold 3/8″ Glitter Ribbon. It’s gorgeous – and it really worked with the Gold Glitz Dazzling Details on the halo around Jesus’ head and the glitter on the snowflake.

So give the challenge a try! It’s a fun one! Link your card to the challenge, and if you’re chosen, you win a free subscription. For every 10 entries, one card is chosen, so the more entries, the more chances you have to win.

Thanks for stopping by Stamping with Buffy. Have a wonderful day!


Filed under: All Ye Faithful, Holidays

Season of Flowers

$
0
0

Reason for the Season, Stampin' Up!

This is another Reason for the Season card. I CASEd Sandy’s card (shown here), but changed it a bit. I added some green leaves to the flower, and a die-cut sentiment.  I also “stretched” the Basic Black card stock and embossed it with the Softly Falling embossing folder. And, finally, I added a bit of Gold Metallic Thread behind the flower and an Iced Rhinestone in the center.

I love this card, but I think the flower would make a better tag or ornament, because, as a card, it costs more to mail. It’s pretty thick with all the layering. It will probably be a card in a gift for a family member.

The Reason for the Season stamp set is available at a 15% discount through 11:55 p.m. MT Friday – as are all the Stampin’ Up! stamp sets. Of course, if you bundle the set and the Festive Flower Builder Punch, you can save 15% on the bundle.

Thanks for stopping by Stamping with Buffy. Have a wonderful day!


Filed under: Holidays

Peaceful Wonderland

$
0
0

Wonderland, Christmas Greetings

Here’s another Wonderland card for you. I stamped the trees repeatedly in Basic Black archival ink. Then I simply sponged different colors over the trees. I used Crushed Curry, Rich Razzleberry, Elegant Eggplant, Night of Navy and Basic Gray archival. I’d love to give you a magic sponging formula, but really, I just keep adding color and blending it together until I get something I like.


For the snow effect, I splattered some Silver Sparkle Dazzling Details/water mixture with an aqua painter, then sprinkled Silver glitter over it.

“Peace” is die-cut using the Christmas Greetings dies and Silver Glimmer Paper. (I think this is the “old” silver. The new Silver Glimmer Paper is a little darker.)

I love the simplicity of this card. It reminds me of the quiet when the snow is falling at night.

Thanks for stopping by Stamping with Buffy. Have a wonderful, peace-filled day!


Filed under: Holidays

Desperate Times

$
0
0

Oh What Fun Tag Project Kit, Stampin' Up!
Desperate times do call for desperate measures. I bought the Stampin’ Up! Oh What Fun Tag Project Kit months ago. I started putting it together in September, I think – but it may have been August. I was at a craft day hosted by Sandy, one of my downline, and I think I was also babysitting my Amelia. In the three or four hours that I was there, I made one each of five tags. This kit makes 30 tags (three each of 10 designs). Wooohooo – only 25 to go.

I took them home and made one or two more, then put the box of tags on the sofa in my craft room. Ashlynn, our cat, loves Stampin’ Up! boxes – especially if they have something in them. And this kit has bells!…and sequins and other shiny things. I’ve mentioned before that Ashlynn is very fond of shiny things, so I decided to put the box on top of the extra fridge (also in my stamp room). And I promptly forgot all about the tags.

Mike bought a treadmill and a bowflex for our mountain house, so we planned to head down the valley today to set them up. I like to take something to stamp when we go to the mountains, and I decided the tags would be perfect. We were only staying overnight, so they’d be a quick project to work on. I grabbed the box, and checked the instructions for “additional products” that I’d need to take. Oh, What Fun Photopolymer Stamp Set – check. Mint Macaron, Garden Green, and Real Red Classic Stampin’ Pads – check. Fast Fuse – check. Crystal Effects – check. Stampin’ Dimensionals – check. 2-Way Glue Pen – check. I added a SNAIL refill (but I forgot to take SNAIL) and some Multipurpose Liquid Adhesive, Paper Snips, Stampin’ Mist, and a Stampin’ Scrub. I also grabbed Saturday’s newspaper, because I knew it would have fat sales flyers that I could use for padding to stamp on. (Have you figured out what I didn’t pack?)

I got to the house, unpacked food and fed the crazy cat, and then sat down to stamp. I was determined to finish the tags tonight. I pulled everything out, picked a stamp to use, and…no block. Ugh. I’ve used clear mount and photopolymer stamps before. I know you need blocks, but in my packing frenzy, I totally forgot. And this isn’t the first time. I forgot to pack them for a workshop once – and that was very embarrassing! Fortunately, some of my stampers that day had blocks in their bags, and my mom had a fat plexiglass ruler that worked great for larger stamps. (I’m going to stick a block in my purse so I’ll always have one.) Now, of course, I have a whole extra set at the office to keep that from happening again. But tonight – I had nothing. My mom’s favorite saying (and I think it’s original) is, “Don’t panic, just improvise.” She’s a master at this. Cooking dinner and don’t have three of the five ingredients? Don’t panic – improvise. Taking a pie to a presentation in front of 300 women and something falls on top of it and messes up the crust? Don’t panic – improvise. Cover the smooshed top with cream cheese icing and it’s now “Fancy French Apple Pie with Cream Cheese Icing” instead of ordinary “apple pie.” (This actually happened. I love my mother. She’s so amazing, and if I’m 1/4 of the woman she is when I’m her age, I’ll be happy!)

I tried several substitutes – a stamp pad, a tile coaster, the lid from the little container I had put the bells in to keep them safe from the cat – but nothing worked. The beauty of photopolymer stamps is you can see through them, and you really need to see where you’re stamping on most of the tags, so you have to have a clear “block.” After my third stamping fiasco, I started searching the cabinets, and I found this.

Oh What Fun Tag Project Kit, Stampin' Up!

It looks like an ordinary Pyrex measuring cup, right? No – it’s an emergency stamp block.

Oh What Fun Tag Project Kit, Stampin' Up!

Would I recommend this over our lovely blocks? Absolutely not. But in a pinch, it was an acceptable substitute. Best of all, I finished the tags, and I’m ready to offer a last-minute tag class. I finished the last 25 tags in less than an hour – even with the Pyrex emergency stamping block. And the tags are so cute! I didn’t change anything or try to be original. The way I see it is the reason for the project kits is so you don’t have to think when your life is crazy and your mojo is at an all time low. Just go with the instructions and you have gorgeous projects in minutes. And it’s stress-free, which is good, because during the holidays, the last thing you need is more stress.

Thanks for stopping by Stamping with Buffy. Have a wonderful day!


Filed under: Holidays

Getting Ready for Spring!

$
0
0

Stampin' Up!, Retiring Holiday Catalog Products

SPRING???? Talk about rushing the season. It’s not even Thanksgiving. People are complaining about stores pushing Christmas already, and I’m talking about spring?

Crafters are almost always 2-4 months ahead of the calendar. I started making Christmas cards in August. But, of course, we have to get you hooked on an idea, and then you have to purchase the product, wait for it to ship (which can seem like an eternity, depending on where you live. Ok – it seems like an eternity when I overnight an order), and then you have to create the project.

Stampin’ Up!’s current Holiday catalog sales period will be ending January 4, and for the first time, Stampin’ Up! is releasing a list of products from a seasonal catalog that will be retiring soon. These items from the Holiday catalog will be available only through January 4 or while supplies last. That means if there’s something you love and have been holding off buying, you need to order it now! They’re clearing out most of the fall and winter products so they’ll have room for the amazing products in the upcoming Occasions catalog. Remember – these products are while supplies last, so don’t wait until January 3 – or even December 1 – to order. Popular items will be gone before you know it.

This doesn’t mean I’ll be posting flowers, birds, and butterflies from now until March. I still plan to show you beautiful projects you can create with the Holiday and Annual catalog products. But for today…I’m out of town with no projects to show you. Poor planning on my part, I know.

Here’s a video showing how to use an annual catalog product – the Envelope Punch Board – in an unusual way. You won’t be creating envelopes; you’ll make a flower! Fun, right? And super easy. And while you have your punch board out, why not make a few envelopes for your Christmas cards with the Real Red Envelope Paper and Red Foil Sheets? You don’t have an Envelope Punch Board? Be sure to add that to your order! If your order reaches $150, you’ll earn Stampin’ Rewards!

Thanks for stopping by Stamping with Buffy. Have a wonderful day!


Filed under: Videos

Advent Calendar Banner Box Set

$
0
0

Celebrate each day of December up to Christmas with a sweet little treat all held on a twine banner in these cute little boxes that are all decked out in red and gold. Want to give this banner as a gift? The coordinating box holds all 25 boxes folded flat with mini clothespins, twine, and decorative trim.

Stampin' Up!, Craft Project Central

This sweet project was designed by Amanda for Craft Project Central. To get the instructions, simply subscribe to November, or select one of the 3-month or discounted 6- or 12-month packages.

Thanks for stopping by Stamping with Buffy. Have a wonderful day!


Filed under: 3-D and other projects, Craft Project Central, Holidays

(Not) Going, Going, Gone Hop

$
0
0

This post will remain on top through Saturday, November 21. Please scroll down for more recent posts.

The Stampin’ Up! Online Extravaganza begins Monday, November 23! Scroll down for more information, or view the list here.


November 2015 Banner

Wednesday Challenge, Thursday Hop! Those Wacky Watercooler ladies are keeping me, well, hopping! This time we’re focusing on Christmas and Hanukkah projects. We’ll be using products from the Stampin’ Up! Annual and Holiday catalogs. We also have the option to include a retired product. (‘Fess up…we all have that one retired product that we’ll never let go of, right?) I’m using my favorite retired bundle so I can use the “going, going, gone” theme without any qualms.

You may have arrived here from the blog of the amazing Jean Fitch. Jean is always thinking outside the box, and she has such fun projects, doesn’t she? If you’re starting with me, though, that’s ok! You can just keep following “next” buttons all the way around until you get back here. Or you can even follow “previous” buttons if you’d rather hop backwards. (Don’t you love circles?) If you get lost, you can always find your way back via the Wacky Watercooler Hop Blog. So – fasten your seat belt! Here we go.

I have projects using “current & continuing” products, “current by retiring” products, and retired products. So let’s start with the current and continuing.

Snow Day, Stampin' Up!

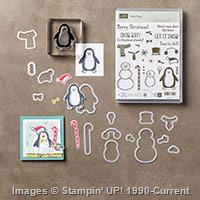
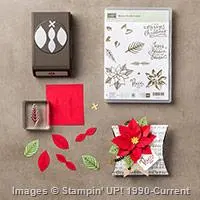
I love the Snow Day bundle. These images are so fun to use, and you can mix and match the “accessories.” They’re kind of like paper dolls, don’t you think? (Shameless self-promotion – I used this set for an AWESOME project for Craft Project Central. Keep checking back in December to see it! I think it’s one of the most fun projects I’ve ever made.)

You’ve seen the penguin “treat holders?” This is the same idea, but I decided to turn them into place cards for Christmas dinner. Cute, right? You can add little candy nuggets in the base to make sure they stay upright – and it’s an extra treat for Christmas! Simply stamp and die-cut one for the front, then cut another for the back. The back doesn’t have to be stamped since it’s the, well, back.  You can also use them for napkin rings. I can’t wait to see the smiles when my family sees these at Christmas!

The Christmas Cuties set is retiring after January 4 (*sad*). I love this set, so I decided to design a whole trio of cuties.

Christmas Cuties, Stampin' Up!

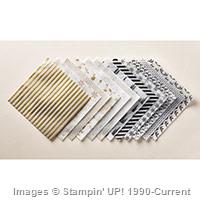
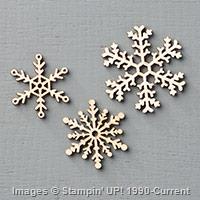
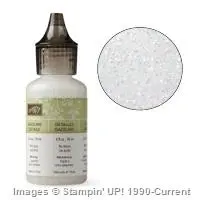
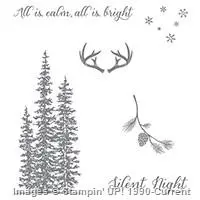
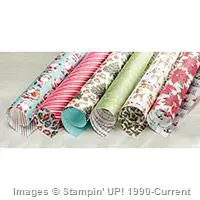
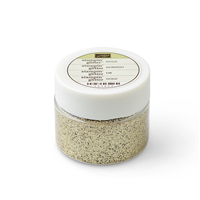
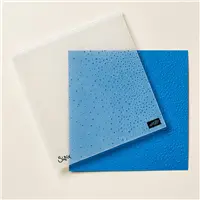
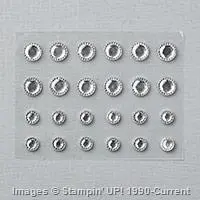
All three cards have the same layout, although the colors and designer series paper are different. Stamp the evergreens from Wonderland (also retiring. A moment of silence, please.) in Mossy Meadow, add a strip of designer series paper (Home for Christmas; Season of Cheer), then stamp, color,  and fussy cut the cuties. Add some snowflakes, Dazzling Details, and a sentiment and you’re finished. Super easy!

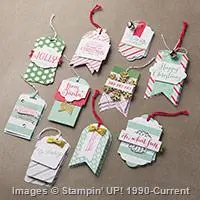
And finally, my favorite retired Christmas set! I kept the Holiday Home stamp set and die-cut because my husband Mike is a real estate broker and the bundle works perfectly for closing gifts. This greeting card/gift card holder set is for a closing he has on Friday.

Holiday Home, Stampin' Up!

I’m going to make a bunch of these to have on hand. I’ll make more with “snow,” then several with grass for spring/summer closings. (He’s been keeping me busy this year! I’m so proud of him.) I love having the coordinating card/gift card holder. And the sentiment is perfect. It’s from one of the Paper Pumpkin kits. If you’re a current subscriber, you can order past kits and refills (as available).

Before I leave, I have one more Christmas Cutie for you.

AmeliaWithFlowers

This is Miss Amelia, dressed for fall. And, yes, in Virginia, we have hats and scarves and flowers all in the same day. My granddaughter loves flowers. Mostly, she loves to taste the petals, but I’m sure one day she’ll enjoy looking at and smelling them as well. I can’t believe she’s almost 15 months old. Where does the time go?

Your next stop on the Christmas tour is the fabulous Marie Green. Prepare to be “wow-ed!”

Thanks for stopping by Stamping with Buffy. Have a wonderful day!

WWBlogHop_Next WWBlogHop_Prev WWBlogHop_Home1


Filed under: Holidays

Hello December Organizer and Holiday Accessories

$
0
0

The Stampin’ Up! Online Extravaganza begins Monday, November 23! Scroll down for more information, or view the list here.

You’ll say a happier hello to December when you’re organized and ready for this busiest of months!  This project features the Hello December 2015 Project Life Card Collection and Hello December 2015 Project Life Accessory Pack as a fun organizer…with the support of a double Berry Basket to help keep everything together!  This project also includes lovely ornaments, three sets of holiday gift tags and three holiday greeting cards.  This project and these amazing Project Life cards…in combination with the bright, fun accessories…are the perfect canvas for an organized December and a lovely holiday season!

Stampin' Up!, Craft Project Central

This gorgeous holiday project was designed by Sue for Craft Project Central. To get the instructions, simply subscribe to November, or select a 3-month or discounted 6- or 12-month package.

Here’s  a side note about Sue. She is one of the new Artisan Design Team members for Stampin’ Up! I’m so happy for her; that’s a huge honor – and she deserves it. Her creations are stunning.

Thanks for stopping by Stamping with Buffy. Have a wonderful day!


Filed under: 3-D and other projects, Craft Project Central, Holidays

All that Glitters

$
0
0

The Stampin’ Up! Online Extravaganza begins today! View the list here.

Stampin' Up!, Home for Christmas

I didn’t use all the Stampin’ Up! gold products on this card, but I was tempted! I love the Home for Christmas designer series paper, and I wanted to use some images from it on this card.

First, I cut out the tree, packages and Santa from the dsp. As I looked at the paper, I remembered I had a card pack left over from my workshops last week that would work really well with this card. The packet had a Mossy Meadow card, Soft Sky layer, a piece of White Glitter Ribbon, and a strip of Home for Christmas dsp. I decided the little strip of dsp would be too much, so I substituted some Real Red cardstock.

The Soft Sky layer was a little plain, so I embossed it, using the Softly Falling Textured Impressions Embossing Folder. All that was left was to add the paper cut-outs.

I loved the White Glitter Ribbon we used at the workshop, so I decided to really glam this card up with the Gold. (The ribbon packages comes with both!) I touseled some Gold Metallic Thread behind the tree, then tied a little Gold Cording Trim around the card.

After adding the Santa and packages, I decided we needed just a little more glitz. I added a bit of Gold Glitz Dazzling Details to the star on the tree, and some Dazzling Details to the packages and the snow/ice around Santa’s feet. I was going to add a Gold Foil die-cut sentiment, but it was too big and really overwhelmed Santa and the tree. Maybe inside…

Don’t forget to place your Online Extravaganza order! There’s a fabulous 24-hour Flash Sale today with selected designer series paper (buy three, get one free), a Paper Pumpkin kit that you can buy even if you’re a non-subscriber, and two punch boards. Next Monday will bring another 24-hour Flash Sale. Check out the list here. You can order sale items, clearance rack items, online only products, and current catalog products on the same order. Don’t miss out; order today!

Thanks for stopping by Stamping with Buffy. Have a wonderful day!


Filed under: Holidays

Altered Muffin Tin Décor & Greeting Card

$
0
0

As the holiday season is nearing, wouldn’t it be fun to decorate your home with this holiday décor item? Perfect for your table, wall, or refrigerator, this sweet 3-D project could also work as a countdown calendar, and for hiding holiday treats and treasures. Give your craft punches and dies a workout to make holiday scenes, getting a glimpse of all the fun and precious things you are looking forward to. This project is also great for holiday stamp camps and small classes.

Altered Muffin Tin & Card

This adorable project was designed by Monika for Craft Project Central. To get the instructions, simply subscribe to November, or select one of the 3-month, or discounted 6- or 12-month packages.

Thanks for stopping by Stamping with Buffy. Have a wonderful day!


Filed under: 3-D and other projects, Craft Project Central, Holidays, Uncategorized

33 Years and Counting

$
0
0

33 years ago today (like almost this minute), I married the most incredible man. I thought I was totally, madly in love with him, but I was wrong. What I felt then was nothing compared to how much I love him now. He’s my best friend, my partner in all things, my confidante, my life-long love. I can’t imagine spending my life with anyone else. We’ve been through ups and downs (but mostly “steadies”) in life over the past 33 years, but he’s always the same. He’s a rock – and he’s the best. I love you, Mike Cooper – with everything that I am.

One of the things I love most about Mike is that he never questions my love of paper crafting. He doesn’t share it, but he admires (most of) the things I make, and indulges my addiction. We’re heading out of town for our anniversary, and I’m taking some craft supplies, of course.  I’ll be making cards to send to our clients for Christmas. I’m so excited. This will be the first time he hasn’t bought them! And he only buys them because he thinks it will be too much work for me to make them. (Work? WORK? It’s a stress-reliever, not work!)

Since I’ve been making cards for classes, for my blog, for the assisted living facility, and for our businesses, I’ve been neglecting the ones for personal use. Well, it won’t be the first time I sent Christmas cards out after New Year. I have been working on some gift tags, though. I bought some from one of the kids’ friends years ago, and I’ve finally used them all up. So I thought it was time to design my own.

Stampin' Up!, Tags, Cozy Christmas, Reason for the Season

These are all really simple and quick. The three larger ones are punched with the Ornate Tag Topper Punch and decorated with flowers are from the Reason for the Season bundle. All the other stamps for the tags are from the Cozy Christmas set.

The two smaller tags open and the “to/from” is inside. I used the Tags & Labels framelits to die cut them. Simply cut a piece of card stock twice as wide as the die and fold in half. Place the framelit so the left edge is a little past the fold, and run it through the Big Shot. Fun!

The ice skating Santa is, of course, fussy cut. I love the Home for Christmas designer series paper. I’m really going to miss it when it retires!

And speaking of retiring – be sure to grab any of the retiring Holiday Catalog products you want now. They accessories are only available “while supplies last” – and some are already retired. (A moment of silence while we fondly remember the Woodlands Textured Impressions Embossing Folder. And, no, I won’t be selling mine, even when it reaches astronomically high prices on ebay.) So place your order now. And remember to snatch up some of the great Online Extravaganza deals as well!

Thanks for stopping by Stamping with Buffy. Have a wonderful day!


Filed under: 3-D and other projects, Cozy Christmas, Holidays

Honeycomb Star Ornament Gift Set

$
0
0

Make this beautiful 3D honeycomb star ornament to deck your halls with some holiday sparkle. Or give this lovely ornament as a gift with the coordinating card and box that allows the ornament to spin inside and show off that sparkle. This would make an excellent hostess gift or class project! The patterns, colors, and stamps can easily be changed out to match those of another holiday if you don’t celebrate Christmas.

Stampin' Up!, Craft Project Central

This beautiful project was designed by Amanda for Craft Project Central. To get the instructions, simply subscribe to November, Or – select one of the 3-month or discounted 6- or 12-months packages.

Thanks for stopping by Stamping with Buffy. Have a wonderful day!


Filed under: 3-D and other projects, Craft Project Central, Holidays

Watercooler Wednesday Sketch Challenge

$
0
0

water

Welcome to another Watercooler Wednesday challenge! This week, we have a sketch challenge from my dear friend Susan.

Club Challenge October 2014-001

How fun is that? There are so many possibilities for ribbon, washi tape, or designer series paper scraps, don’t you think?

Here’s my card.

Season of Cheer, Joyful Season, Stampin' Up!, WWC45

Joyful Season is a set that’s in the 2015 Holiday catalog – but it’s retiring, so you need to order soon! I love the cardinal! I’m a Virginia girl, and this is our state bird, so I tend to order all the cardinal stamps.

This one has the look of watercolor, but the ease of a 2-step. You stamp the outline in black (or whatever color you choose), then stamp the inside in red (I used Cherry Cobbler). Easy! There’s even a stamp for the beak. There are also stamps for the branch outline, inside, and the berries. It’s super easy to get a fun, watercolored look without the work.

I used Season of Cheer Designer Series Paper and Washi Tape, and the White 3/8″ Glitter ribbon (sold in a package with gold).  Basically, I used every product in the Season of Cheer suite except for the cardstock pack.

All of that, of course, is retiring January 4, 2016. The accessories (paper, washi tape, ribbon) are only available while supplies last, so if they sell out before January 4, you won’t be able to get them. And you know you want them! The Season of Cheer dsp is lovely, and each sheet has a design that can be used after the holidays are over. Two are kind of “winter specific,” but the others can be used into the spring and summer, so it’s a very versatile selection.

What’s not retiring in January? The Deco Labels Framelits Collection (used for the bird), the Tags and Labels Framelits (used for the sentiment), and the Petite Pairs stamp set. These are all products that you’ll use over and over. Petite Pairs includes a greeting and a sentiment that work together (but you probably figured that out by the name). And the Tags & Labels framelits are perfect for creating last minute gift tags, or for a card or scrapbook page embellishment.

Give Susan’s cool sketch a shot. You can see more inspiration on the challenge blog. Then create your project and link it to the blog. Challenges are a wonderful way to get your creative juices flowing!

Thanks for stopping by Stamping with Buffy. Have a joyful day!


Filed under: Holidays, Joyful Season, Petite Pairs
Viewing all 68 articles
Browse latest View live


Latest Images